or How to spend a rainy morning.
Monday night I sat down and made a tentative menu plan for the week. Tentative because I have a teenage son that likes to throw monkey wrenches into our dinner plans by showing up when he said he wouldn’t be home for dinner….or, alternately, NOT showing up when he said he would. Granted the latter is the better scenario. Either way, menu planning has been a wee bit frustrating lately.
Anyhow…since I knew that Tuesday was suppose to be rainy and on the cool-side, I decided to make life easy for myself and planned for soup and grilled cheese sandwiches. What could be easier to adjust regardless of BoyWonder’s comings and goings?
Tuesday morning rolled around and everything was going great. I packed Man’s lunch. Then I decided to be a darling wife and fix both Man and BoyWonder breakfast sandwiches for the road….neither one of them likes to eat first thing in the morning.
Then that bacon smelled really good. Dangerous stuff that bacon. I gave in and cooked myself some bacon and eggs…and what is bacon and eggs without a side of buttered toast? Like I said…dangerous stuff that bacon. When it was all said and done, there were but a few lonely slices of bread left from a freshly opened loaf. MMM…how did that happen? I mean we are the family that rarely finishes a loaf in an entire week and in one morning……
Ugh? What to do about dinner now? Then reality hit me….
This was my view from the side porch Tuesday morning:
Another angle:
And if there is any doubt of what kind of morning, here:
Yes….our rain was even earlier than expected. So what better way to spend my morning—since I obviously wasn’t going to be doing my normal sitting on the porch routine—than to bake some bread. Yes, my original menu plan was going to be saved. It wasn’t going to be the super easy plan I had originally envisioned, but….that is life.
And I had another great idea! I would do a Basic Bread Baking Tutorial. No frills or thrills. Just back to basics. Sometimes in this fancy, gourmet Pinterest world, we (*I*) forget about the beauty of the basic, simple things in life.
That plan worked great until about half-way through the bread-making process and the phone rang….and I….mmm…..well….forgot to take any more pictures….Especially the ones where I shape the loaves. Oh well….here are a few pictures and a couple of tips…and the recipe. I guess that is the most important thing, the recipe! Just want the recipe and none of my witty commentary and misc. tips? Really? Okay…skip to the bottom. It’s okay….I’m not looking.
Add 2 1/4 cups of milk and 3 tablespoons of butter to a sauce pan. Heat on med-lo to med until the butter melts, stirring occasionally.
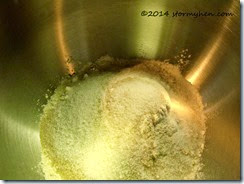
While that is doing its thing, grab the mixing bowl of you stand mixer. Add 3 cups of all-purpose flour, 2 pkgs of yeast, 2 tablespoons of sugar, and 2 teaspoons of salt.
Once your butter has melted, grab an instant read thermometer and check the temp of the mixture.
I like to let my mixture cool down to about 105 degrees F. If you add liquid that is too hot to the yeast, you will kill it. I read that up to 120 degrees is okay. Not wanting to be a yeast murderer, I decided to wait on my normal 105. What to do while I wait?
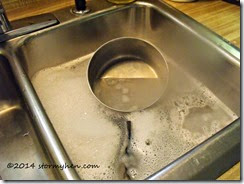
Oh yes, our new-to-us home doesn’t have a dishwasher (or any room to add one!). So I decided to fill a sink with some soapy water to “clean as you go”. You know that rule, right?
Obviously this picture was taken a little later AFTER I had poured the milk/butter mixture into the mixing bowl.
Which brings me to….. Once the milk/butter mixture has cooled enough, pour it into the bowl with the dry ingredients you added earlier.
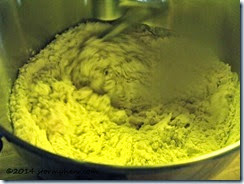
Yep….just pour it right on top. Then take the bowl and attach it to your stand mixer. Then attach your dough hook. Mix on a medium speed for a couple of minutes. Yes, I know that Kitchen-aid says to use speed 2, but I’m a rebel AND the mixture is still quite loose. All you are doing at this point is combining a few dry ingredients and the wet ingredients. Just do not use a speed so high that you have milk and/or flour flying all over your kitchen.
Turn OFF your mixer and add 2 3/4 cups of flour to the bowl. NOW turn the mixer on to 2 (as recommended by Kitchen-aid) or whatever speed your stand mixer’s manufacturer recommends….because we are about to get serious. Okay…the mixer is about to get serious….for about 4-6 minutes or until the dough clings to the hook and pulls away from the bowl. If it hasn’t done this at the end of the time…add a little bit more flour…say 1/4 cup.
So have you noticed that blur on the last few photos yet? Apparently, I got just a wee bit too close to the milk/butter mixture when I was taking the temp. picture. Yeah…I was a bit slow in realizing what caused that aggravating blur. So, NO, your vision hasn’t gone wonky. I am not sure that the same can be said of mine. ![]()
After your 4-6 minutes of kneading time is up—as long as the dough has pulled away from the sides of the bowl—turn off the machine, set a timer for 15 minutes and WALK AWAY! Your dough looks a little sticky still? DO NOT ADD FLOUR…just walk away. Seriously, it will be okay.
I should pause to say that right after I took the picture above, my phone rang. And that is why you have no photo of my sticky dough for reference. Sorry. What can I say? I am very easily distracted. And did I mention that on the other end of the line was my BFF from my hometown….and we talked for 2+ hours? I hope that is enough of an explanation for why there are NO MORE photos until the finished loaves were sitting on a cooling rack!
After your timer goes off, go feel your dough. If it is slightly sticky—as in the dough releases easily from you finger when you pull it from the dough—then time to put it into a greased bowl for rising. If there is actually dough stuck to your finger, add your remaining flour 1/4 cup at a time, kneading for a couple of minutes after each addition until the dough is just slightly sticky and place in a greased bowl….make sure to turn once so the top of the dough is greased. Otherwise, you will have a hot mess after it has risen and you try to uncover it. Not that I’ve ever had that experience.
Cover your dough (I use a damp flour sack towel) and put in a warm place to rise until doubled….about 1 hour, depending on the temp. in your kitchen. Since my kitchen is usually on the cool side, I put my dough into a slightly warm oven to rise. (turn your oven on WARM for about 2 minutes, turn off and put you dough in and shut the door….if you don’t have a WARM setting…just heat on about 200 degrees F for a minute)
Once your dough has doubled in size, punch it down and divide it in half. Form each piece into a loaf. You can do this by just gently shaping it with your hands into a loaf shape. This is simple and usually effective. HOWEVER, unless I am in an extreme hurry (or feeling lazy), I prefer to roll each portion into a rectangle (about 9 x 14 inches), removing air bubbles. Then taking a short end and rolling the dough into a tight loaf. Pinch together the seam and ends…tucking the ends under toward the seam side. Then place with the seam side down into a greased bread pan. Shaping the bread in this way eliminates most of the air bubbles that would otherwise become holes in your baked loaves!
See why photos would have been so very useful. If you own a Kitchenaid mixer, this method is illustrated in your owner’s manual/recipe booklet.
Cover your loaves, and allow to rise until doubled. I find that this 2nd rise usually only takes about 30 minutes. If you let it rise too much, you will have excessive air bubbles in your top crust.
Bake your loaves in preheated 375 degree F. oven for 10 minutes. Reduce heat to 350 degrees and continue baking for an additional 20- 30 minutes or until an instant read thermometer inserted into the center of a loaf is 190 degrees F. I cover my loaves with aluminum foil during the last 10 minutes of baking to prevent the tops from getting too brown. Remove bread from pans and allow to cool on a cooling rack for at least 20 minutes….Yes, I know!!! But waiting allows to the bread to finish cooking completely and makes for a much prettier slice.
The finished product:
Did I say no frills or thrills? How about one little frill.
I decided to turn one loaf into a cinnamon swirl loaf. When it was rolled out into a rectangle, I spread butter onto it, sprinkled it with a generous amount of coconut sugar and cinnamon, and then rolled it into a loaf—another reason for shaping your loaf by rolling it out!
Basic White Bread
Makes 2 loaves
- 2 1/4 cups milk
- 3 tablespoons butter ( or coconut oil or shortening)
- 3 cups all-purpose flour
- 2 pkgs. active dry yeast (or equivalent instant yeast)
- 2 tablespoons sugar (or honey)
- 2 teaspoon salt
- 2 3/4 cups to 3 1/4 cups all-purpose flour
Heat milk and butter in a saucepan until butter melts. Allow to cool to 105 degrees F. In the bowl of your stand mixer, add 3 cups flour, yeast, sugar and salt and milk/butter mixture. Place bowl on stand mixer and attach dough hook. Mix on medium speed for 2 minutes. Stop mixer and add 2 3/4 cups of flour to bowl. Knead dough on speed 2 of a Kitchen-aid mixer for 4 to 6 minutes. At this point the dough should be clinging to the hook and pulling away from the sides of the bowl. If it is not, add additional flour 1/4 cup and knead an additional 2 minutes. Allow to rest for 15 minutes. Touch the dough with your finger. If it springs back when you remove your finger, it is ready to rise. If dough is stuck on your finger, add additional flour 1/4 cup at a time, kneading a minute or two after each addition; being careful to NOT add more flour than the total amount above. Place dough in a greased (oiled) bowl, turning the dough to cover in oil. Cover the bowl with a towel and place in a warm place to rise until doubled (about 1 hour). Uncover dough and punch down. Shape into 2 loaves and place into well-greased loaf pans. Cover and allow to rise until doubled (about 30-45 minutes). Bake in preheated 375 degrees F. oven for 10 minutes. Reduce heat to 350 degrees and continue baking for 20-30 minutes. Cover the loaves with aluminum foil if they start to get too brown on top. Remove loaves from pans and cool on a rack for 20 minutes.
Until next time,
Sammi


