Wednesday, January 7, 2015

Enjoy Life: Getting Supper to the Table


None of the following is a NEW idea. It is actually how I used to do things….and for some reason just stopped. One day I realized that I USE to be organized and my house was almost always clean. I had enjoyed cooking. AND I always seemed to have time for OTHER stuff: crafts, reading, HOMESCHOOLING my kids. Why were things so HARD now? With an empty nest???? (though BoyWonder is home from college on holiday break….and boy does the overflowing laundry hamper prove it!) The answer: I had allowed myself to overcomplicate life. Back to basics! Time to enjoy life again….including while doing everyday tasks. Especially when doing everyday tasks!!!!

Here is how to ENJOY getting a meal prepared or at least not hate it so bad!

1) Plan your menu! Cooking on-the-fly is NOT enjoyable. It is stressful. Here is the menu for the meal I cooked on this night: [More planning in step 3]

  • Pork Chops with caramelized onions and thyme
  • Risotto
  • Roasted Broccoli
  • Caesar Salad

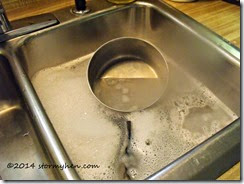
2) Try to start with an empty dishwasher, if you have one. If you are like me, sans dishwasher, run a sink half full of hot, soapy water. You are going to clean as you go! *I start with 1/2 a sink of water so that I can add more hot water, as needed.

3) Read your recipe(s).

  • Make sure you actually have the ingredients that you need!
  • Make sure you understand the recipe.
  • Estimate how long it will take to prepare the meal, including prep work (more on this later). Add a few minutes to this time. Especially if you are working with a new recipe! Plan the order in which you need to cook so that everything is ready at approximately the same time.

*the night I cooked this meal, I had forgotten that I had used all the shredded Parmigiano-Reggiano the night before…..therefore, I did NOT plan enough time for shredding the cheese AND cleaning the food processor….and dinner was late! Learn from my mistake. Winking smile

  • Read your recipe again!!! Especially if it is a new one or if it has been a while since you used it.

read your recipe first

*If you are looking for a good Italian cookbook for beginners, I recommend Lidia’s Family Table.

4) Mise en Place (Put in Place)

  • In other words: Get ready to cook! Okay….you are not about to cook yet. There is still some prep work that you need to do!
  • You’ve read your recipes and re-read your recipes and it is time to start preparing your meal! Now get out the proper pans for the job.

select correct pans

  • Do you need to preheat the oven? If so, turn it on now. It takes a lot longer than you think for most ovens to reach the needed temperature.
  • Start prepping your ingredients. Prepare ALL of your ingredients before you even think about turning on a heating element on the stovetop!

prep ingredients 

    *I needed small diced onions for the risotto and thin slices for the pork chops. Plus I chopped some extra for keeping in the fridge for salads. Think ahead. While the cutting board is out, what can you prep for future meals and snacks? and only have to clean ONE mess.

    *Work outside the home or have lots of activities that limit your time to prepare/cook a meal each night? Take time early in your week, perhaps on a Sunday afternoon, to prepare most of your ingredients for the week. Wash, dice, and slice and store in the fridge. Do not be afraid to buy your veggies already ready already!

  • Measure your ingredients and place them near your stove. This photo is still missing a few ingredients. The wine was still on the counter behind me. And raw pork chops? Not a very appealing photo….so I spared you. Just know that everything was within reach before I started heating my pans.

mise en place

broccoli and cauliflower on pan

  • The Broccoli/Cauliflower ready-to-cook bags were on sale. So no prep on my part other than placing on a baking sheet and drizzling with olive oil. (A little salt and grated Parm.-Regg. were added before serving).

5) Clean. Yes, I know that you want to just cook the food already. Clean anyway. You will thank yourself later!

clean dishes


  • These are the dishes that I washed before/as I cooked. Most were from meal prep. A few were from Man’s lunch box. The rest had magically appeared throughout the day. The only things that you should need to wash while you are cooking are the dishes that your prepared ingredients were in. SO…
  • As you have a moment while cooking wash one or two things, being careful to not forget your cooking food. Once you are done cooking, the only things that will need cleaning are the pans you used! Talk about enjoying cooking more!

6) NOW it is really time to start cooking following your plan.

For my meal:

  • Everything had approximately the same cooking time. First, I put my chicken broth in a pan to heat. Then I started preheating my risotto pan and my pan for the pork chops. (Stainless steel pans need to be preheated BEFORE adding your cooking oil/food to prevent excessive sticking….)
  • Once my pans were heated I added oil to my pans. Then into the oven went the broccoli/cauliflower.
  • My oil was warm…so chopped onion into the risotto pan and a quick stir. Pork Chops into their pan.
  • Then I continued with my plan, including washing dishes as needed.
  • Voila! My food was ready. And since I cooked with a plan and thoughtfully, it was a much more joyful experience!!!

food is ready

*Everyone who wants a salad fixes their own from prepared ingredients. Everyone gets a custom made salad, without additional work for me! I let them know when the food is close to ready, so they can make their salad as I finish cooking.

7) Use serving dishes for easier clean-up.

  • I know you are wondering how dirtying up MORE dishes could possibly lead to easier cleanup.

cooking pans soaking

  • Because you can let those cooking pans soak while you eat. Which leads to easier cleaning after your meal!

* This particular night, I only used one serving dish: a large round platter for the pork chops. I also used a small glass storage bowl for the caramelized onions since I knew that there would be some left and all I would have to do was pop on the lid and place in the fridge! The risotto was served straight from the pan and the leftovers were also stored in it….The leftovers were served the next day for lunch. Then that pan soaked while I did other household tasks.


Make a plan. Follow your plan. Enjoy life more!!!

Until next time,

Sammi

Saturday, October 25, 2014

Old-Fashioned Banana Bread

Today is a recipe only post. My daughter asked that I put my banana bread recipe here….It is easier for her to find the recipe when she needs it. Since I have no bananas and absolutely no desire to step foot in a store today….no photos.


Old-Fashioned Banana Bread

Makes 1 loaf


  • 1/2 cup shortening (I use Spectrum)
  • 1 cup sugar
  • 2 large eggs
  • 1 teaspoon baking soda
  • 2 cups all-purpose flour
  • 3 large very ripe bananas, sliced

Preheat oven to 350 degrees F. Grease a large loaf pan with shortening.

Cream shortening and sugar. Add eggs and bananas, mix well. Slowly mix in flour and baking soda. Combine well. Put batter into greased pan. Bake for 1 hour, 10 minutes. Cool for 10 minutes in pan. Remove from pan and place on cooling rack.

*I start checking for doneness at 1 hour by sticking a wooden skewer into the center. It doesn’t come out completely clean, but with a few moist crumbs. I find if you wait for a completely clean skewer, you will have dry banana bread.

**If the top of your bread begins to get too brown before it is finished cooking, tent full over the top.


Enjoy,

Sammi

Wednesday, August 13, 2014

Back to Basics…..

or How to spend a rainy morning.

Monday night I sat down and made a tentative menu plan for the week. Tentative because I have a teenage son that likes to throw monkey wrenches into our dinner plans by showing up when he said he wouldn’t be home for dinner….or, alternately, NOT showing up when he said he would. Granted the latter is the better scenario. Either way, menu planning has been a wee bit frustrating lately.

Anyhow…since I knew that Tuesday was suppose to be rainy and on the cool-side, I decided to make life easy for myself and planned for soup and grilled cheese sandwiches. What could be easier to adjust regardless of BoyWonder’s comings and goings?

Tuesday morning rolled around and everything was going great. I packed Man’s lunch. Then I decided to be a darling wife and fix both Man and BoyWonder breakfast sandwiches for the road….neither one of them likes to eat first thing in the morning.

Then that bacon smelled really good. Dangerous stuff that bacon. I gave in and cooked myself some bacon and eggs…and what is bacon and eggs without a side of buttered toast? Like I said…dangerous stuff that bacon. When it was all said and done, there were but a few lonely slices of bread left from a freshly opened loaf. MMM…how did that happen? I mean we are the family that rarely finishes a loaf in an entire week and in one morning……

Ugh? What to do about dinner now? Then reality hit me….

This was my view from the side porch Tuesday morning:

rainy day 1

Another angle:

rainy day 3

And if there is any doubt of what kind of morning, here:

rainy day 2

Yes….our rain was even earlier than expected. So what better way to spend my morning—since I obviously wasn’t going to be doing my normal sitting on the porch routine—than to bake some bread. Yes, my original menu plan was going to be saved. It wasn’t going to be the super easy plan I had originally envisioned, but….that is life.

And I had another great idea! I would do a Basic Bread Baking Tutorial. No frills or thrills. Just back to basics. Sometimes in this fancy, gourmet Pinterest world, we (*I*) forget about the beauty of the basic, simple things in life.

That plan worked great until about half-way through the bread-making process and the phone rang….and I….mmm…..well….forgot to take any more pictures….Especially the ones where I shape the loaves. Oh well….here are a few pictures and a couple of tips…and the recipe. I guess that is the most important thing, the recipe! Just want the recipe and none of my witty commentary and misc. tips? Really? Okay…skip to the bottom. It’s okay….I’m not looking.

Add 2 1/4 cups of milk and 3 tablespoons of butter to a sauce pan. Heat on med-lo to med until the butter melts, stirring occasionally.

butter and milk heating

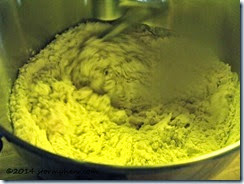
While that is doing its thing, grab the mixing bowl of you stand mixer. Add 3 cups of all-purpose flour, 2 pkgs of yeast, 2 tablespoons of sugar, and 2 teaspoons of salt.

dry ingredients

Once your butter has melted, grab an instant read thermometer and check the temp of the mixture.

a little too warm

I like to let my mixture cool down to about 105 degrees F. If you add liquid that is too hot to the yeast, you will kill it. I read that up to 120 degrees is okay. Not wanting to be a yeast murderer, I decided to wait on my normal 105. What to do while I wait?

Oh yes, our new-to-us home doesn’t have a dishwasher (or any room to add one!). So I decided to fill a sink with some soapy water to “clean as you go”.  You know that rule, right?

Obviously this picture was taken a little later AFTER I had poured the milk/butter mixture into the mixing bowl.

clean as you go

Which brings me to….. Once the milk/butter mixture has cooled enough, pour it into the bowl with the dry ingredients you added earlier.

add milk mixture to dry

Yep….just pour it right on top. Then take the bowl and attach it to your stand mixer. Then attach your dough hook. Mix on a medium speed for a couple of minutes. Yes, I know that Kitchen-aid says to use speed 2, but I’m a rebel AND the mixture is still quite loose. All you are doing at this point is combining a few dry ingredients and the wet ingredients. Just do not use a speed so high that you have milk and/or flour flying all over your kitchen.

first mix

Turn OFF your mixer and add 2 3/4 cups of flour to the bowl. NOW turn the mixer on to 2 (as recommended by Kitchen-aid) or whatever speed your stand mixer’s manufacturer recommends….because we are about to get serious. Okay…the mixer is about to get serious….for about 4-6 minutes or until the dough clings to the hook and pulls away from the bowl. If it hasn’t done this at the end of the time…add a little bit more flour…say 1/4 cup.

2nd mix

So have you noticed that blur on the last few photos yet? Apparently, I got just a wee bit too close to the milk/butter mixture when I was taking the temp. picture. Yeah…I was a bit slow in realizing what caused that aggravating blur. So, NO, your vision hasn’t gone wonky. I am not sure that the same can be said of mine. Winking smile

After your 4-6 minutes of kneading time is up—as long as the dough has pulled away from the sides of the bowl—turn off the machine, set a timer for 15 minutes and WALK AWAY! Your dough looks a little sticky still? DO NOT ADD FLOUR…just walk away. Seriously, it will be okay.

I should pause to say that right after I took the picture above, my phone rang. And that is why you have no photo of my sticky dough for reference. Sorry. What can I say? I am very easily distracted. And did I mention that on the other end of the line was my BFF from my hometown….and we talked for 2+ hours? I hope that is enough of an explanation for why there are NO MORE photos until the finished loaves were sitting on a cooling rack!

After your timer goes off, go feel your dough. If it is slightly sticky—as in the dough releases easily from you finger when you pull it from the dough—then time to put it into a greased bowl for rising. If there is actually dough stuck to your finger, add your remaining flour 1/4 cup at a time, kneading for a couple of minutes after each addition until the dough is just slightly sticky and place in a greased bowl….make sure to turn once so the top of the dough is greased. Otherwise, you will have a hot mess after it has risen and you try to uncover it. Not that I’ve ever had that experience.

Cover your dough (I use a damp flour sack towel) and put in a warm place to rise until doubled….about 1 hour, depending on the temp. in your kitchen. Since my kitchen is usually on the cool side, I put my dough into a slightly warm oven to rise. (turn your oven on WARM for about 2 minutes, turn off and put you dough in and shut the door….if you don’t have a WARM setting…just heat on about 200 degrees F for a minute)

Once your dough has doubled in size, punch it down and divide it in half. Form each piece into a loaf. You can do this by just gently shaping it with your hands into a loaf shape. This is simple and usually effective. HOWEVER, unless I am in an extreme hurry (or feeling lazy), I prefer to roll each portion into a rectangle (about 9 x 14 inches), removing air bubbles. Then taking a short end and rolling the dough into a tight loaf. Pinch together the seam and ends…tucking the ends under toward the seam side. Then place with the seam side down into a greased bread pan. Shaping the bread in this way eliminates most of the air bubbles that would otherwise become holes in your baked loaves!

See why photos would have been so very useful. If you own a Kitchenaid mixer, this method is illustrated in your owner’s manual/recipe booklet.

Cover your loaves, and allow to rise until doubled. I find that this 2nd rise usually only takes about 30 minutes. If you let it rise too much, you will have excessive air bubbles in your top crust.

Bake your loaves in preheated 375 degree F. oven for 10 minutes. Reduce heat to 350 degrees and continue baking for an additional 20- 30 minutes or until an instant read thermometer inserted into the center of a loaf is 190 degrees F. I cover my loaves with aluminum foil during the last 10 minutes of baking to prevent the tops from getting too brown. Remove bread from pans and allow to cool on a cooling rack for at least 20 minutes….Yes, I know!!! But waiting allows to the bread to finish cooking completely and makes for a much prettier slice.

The finished product:

finished loaves

Did I say no frills or thrills? How about one little frill.

cinnamon surprise

I decided to turn one loaf into a cinnamon swirl loaf. When it was rolled out into a rectangle, I spread butter onto it, sprinkled it with a generous amount of coconut sugar and cinnamon, and then rolled it into a loaf—another reason for shaping your loaf by rolling it out!


Basic White Bread

Makes 2 loaves

  • 2 1/4 cups milk
  • 3 tablespoons butter ( or coconut oil or shortening)
  • 3 cups all-purpose flour
  • 2 pkgs. active dry yeast (or equivalent instant yeast)
  • 2 tablespoons sugar (or honey)
  • 2 teaspoon salt
  • 2 3/4 cups to 3 1/4 cups all-purpose flour

Heat milk and butter in a saucepan until butter melts. Allow to cool to 105 degrees F. In the bowl of your stand mixer, add 3 cups flour, yeast, sugar and salt and milk/butter mixture. Place bowl on stand mixer and attach dough hook. Mix on medium speed for 2 minutes. Stop mixer and add 2 3/4 cups of flour to bowl. Knead dough on speed 2 of a Kitchen-aid mixer for 4 to 6 minutes. At this point the dough should be clinging to the hook and pulling away from the sides of the bowl. If it is not, add additional flour 1/4 cup and knead an additional 2 minutes. Allow to rest for 15 minutes. Touch the dough with your finger. If it springs back when you remove your finger, it is ready to rise. If dough is stuck on your finger, add additional flour 1/4 cup at a time, kneading a minute or two after each addition; being careful to NOT add more flour than the total amount above. Place dough in a greased (oiled) bowl, turning the dough to cover in oil. Cover the bowl with a towel and place in a warm place to rise until doubled (about 1 hour). Uncover dough and punch down. Shape into 2 loaves and place into well-greased loaf pans. Cover and allow to rise until doubled (about 30-45 minutes). Bake in preheated 375 degrees F. oven for 10 minutes. Reduce heat to 350 degrees and continue baking for 20-30 minutes. Cover the loaves with aluminum foil if they start to get too brown on top. Remove loaves from pans and cool on a rack for 20 minutes.

Until next time,

Sammi

Friday, January 3, 2014

Excellent Womanhood


Like many Christian women, I have a love/hate relationship with the Proverbs 31 Woman. I mean, we already have the impossible-to-live-up-to example of Jesus. However, with Jesus, we can at least humor ourselves when we fail to live up to His example…..because He IS God! But with this Proverbs 31 chick? Well, she was completely HUMAN! And while, as far as we know, she was just made up as an example of an ideal woman by Lemuel’s mother, I don’t think she would be there as an example IF it were impossible to reach those heights. Also—if you really think about it—isn’t her life an example of living the abundant life that Jesus spoke about. She has a FULL life! Living that full life—with a reverent fear of God—leads to her being called blessed. Not exhausted. Not a martyr. Not a second-class human. BLESSED! I don’t know about you, but I want to be looked at as someone who leads a blessed, abundant life. Plus, as an adopted daughter of the heavenly Father, it is my birthright. It is about time I start living like it!

So prayerfully, I have chosen as my Theme of the Year:

Excellent Womanhood

While the Proverbs 31 Woman is an example of excellent womanhood, let’s not forget that she is only ONE example from the bible. We also have Queen Esther, Abigail, Sarah (with both examples of what-to-do and what-NOT-to do), Ruth, and many others.

Still, I am starting from Proverbs 31 verse 15 (from the Amplified Bible)…..

She rises while it is yet night and gets [spiritual] food for her household and assigns her maids their tasks. [Job 23:12.]

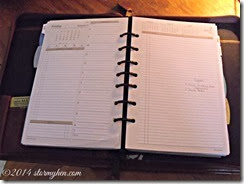
How am I applying this in practical terms? For me it will ideally begin in the evening planning for the following day. For now, trying to keep the Proverbs 31 Woman and the teachings of Titus 2 in mind, I am writing down that plan in my Day Timer. The first thing scheduled is Quiet Time: time to read my bible, pray, and journal. I need to fill up on spiritual food to better tackle whatever the day brings.

schedule quiet time

And while the P31 Woman understood the importance of spiritual food, she did not neglect her family’s need for food food. So I also include the Meal Plan and an estimated time to start the cooking process in order to serve supper on time.

Planning day

The P31 Woman was physically strong. In our modern world, I do not exert myself as physically as she did do accomplish my daily tasks. My servants—the washing machine, dishwasher, stand mixer, and others—do much of the hard work. Therefore, I have to EXERCISE. If I don’t schedule it, and continuously tell myself all of its benefits, it doesn’t happen.

Obviously, the P31 Woman takes care of her home. So I add my homekeeping tasks to the schedule. In the future, I will give more details of my Homekeeping Schedule. For now, here is a quick summary of the current schedule:

  • Daily: basic maintenance, such as dishes, laundry (I HAVE to do some each day or it is soon a chaotic mess), tidying, etc.
  • Monday: Bathroom and Living Room
  • Tuesday: Errands* and Special Projects
  • Wednesday: Kitchen
  • Thursday: Office and Weekly Planning (menus, shopping lists, etc.)
  • Friday: Bedroom and Ironing

*This is my preferred shopping day, as it is usually much less crowded. However, the reality is that with this crazy winter weather in Upstate NY (remember…I am a southern girl, who HATES being cold!!!), I schedule my errands around the weather. So Errand Day can be—and often is—switched with any other day.

I think this takes care of the “bare bones” of my schedule. So I will leave it there for now. Later, I will tell you about the “life enhancers”.

Until next time,

Sammi
*Photos that are not my own are linked to the source. Just click on them.

Thursday, January 2, 2014

Happy New Year and Word of the Year


Happy New Year! I hope each and every one of you had a wonderful holiday season. For me, the season is a blur. Wasn’t I just buying my Thanksgiving bird YESTERDAY? How is it possible that it really is time to store away all my Christmas décor for another year? Even in the midst of the holiday season, I realized that time was moving at warp speed. I believe part of the reason is that my youngest child is now eighteen. He is a senior in high school, attempting to plan out his future while cramming as much as possible into NOW. Which means less and less time at home. I get it. I really do. After all, it is what we parents do. We train our children to leave us. But knowing that doesn’t make the process any easier. My husband and I are definitely in a time of transition into a new season of life. But I digress…

I have been reflecting on life; like many do this time of year. I gave up listing off resolutions several years ago. I now assign themes to the year. The “working title” for 2014’s theme is Excellent Womanhood. We will come back to that on another day.

This year, I have also decided to add a Word of the Year. Often a Word of the Year and a Theme of the Year are/can be the same thing. You only need one or the other. As I worked on my theme, a word kept popping into my head. One that I knew I needed to pay attention to. One that I need to practice. However, in and of itself, it didn’t make the cut for the Theme of the Year. It is, however, the PERFECT complement to ANY theme. Ready? My Word of the Year is……


Present

…..as in being present in the moment. I don’t know about you, but I live WAY too much of my life on autopilot. I pull into the driveway, yet cannot remember the trip home. I look down at an empty plate and barely have a memory of tasting the food. My mind starts wandering—did I check the mail? turn off the oven? when can I run that errand—when I should be listening to what Man is saying to me NOW.

If we are not living in the PRESENT—if we are busy regretting the past or micro-managing the future—all our days will soon become one travelling at warp speed BLUR. And if you have visited here semi-recently, you know that I have decided that I need to actively PURSUE joy. And just let me take a moment to say that a lot has happened since that post that is NOT conducive to joy….

Okay…where was I? Oh, yes, pursuing joy. I am hoping that making a conscience effort to live in the present will also help me to be more joyful.

So…turn off the television, stop the endless multi-tasking and join me in the present. Who’s with me?

Do you have any resolutions? A Theme and/or Word of the Year? Share them in the comments….include a link if you’ve written about them on your blog.

And since EVERY blog post should have at least one photo….here is the scene outside my door….courtesy of Hercules.

January 2 2014

You can click on the photo to enlarge it.

Until next time….

Sammi

Saturday, November 9, 2013

Working on Things for Which You Shouldn’t Have to Work

When I lived in NC, I considered myself a joyful person. I would wake up my children by singing to them….much to their chagrin. I would turn up the music and vacuum with happiness. I loved to take a blanket outside and lie in the shade of the trees and read aloud to my kids. I took pleasure in grocery shopping and cooking. Life wasn’t perfect; but even when I wasn’t happy, I was joyful. I was a bit of a snob about it. And I took it for granted that it would always be so. It was something that came naturally to me. I didn’t have to WORK at it.

I have waited for the past 5+ years for my joy to return. I’ve managed to be happy for short periods of time, but my joy? AWOL! I’ve tried anti-depressants (NEVER again), praying, pretending (both that I was joyful AND that it didn’t really matter), and wine. I’ve begged my husband to look for another job….in the SOUTH. When he refused—because he wants to wait until our son is out of school—I thought about divorce. My brain is functioning well enough to realize that would only make me more miserable…..if only I didn’t really love that man.

So….I’ve decided that if I want to be truly happy—for my joy to return—I’m going to have to do the work. I really started during the summer. I knew it would be easier if I started during my favorite season. At some point, I read about Gretchen Rubin’s “Happiness Project”. I thought about ordering the books, but I decided to start by reading her blog. It has some good information for getting you started on your own happiness project. However, for some reason, her writing style just really bugged me. I decided NOT to read the books. That is until I found them both available on my public library’s e-book catalog. I finished them both last night. Let’s just say that I found it ironic when I came to her writing that she longer felt obligated to finish books that she truly didn’t enjoy. Yes, her books had some helpful info, BUT you can find most (all?) of it on her site and much of it is just reminding you of stuff that you already know….you just forgot that you knew it….The greatest irony? I think if I met Gretchen in real life, I would really like her. If nothing else, I did come to realize that I need to put forth more formal effort toward increasing my joy/happiness. I need to set goals….make resolutions….and do the work!

What about you? What do you do when you feel the joy slipping away? What is YOUR secret to happiness?


Until next time,

Sammi

LinkWithin

Related Posts Plugin for WordPress, Blogger...